Thursday, September 9, 2010

Move Over Oprah...

...this is one of MY favorite things!

It's called Bean Salsa. Some people might call it Cowboy Caviar, but I think Bean Salsa is a little more sophisticated. And there is less association with the eating of fish eggs, which sounds DISGUSTING to me.

I got the recipe from my mom, but I'm not sure where she got it. I LOVE this stuff. When eaten with tortilla chips, it is a beautiful marriage of salty and sweet. It's a struggle to limit myself when I eat it...which can be a problem...anyway, here's the recipe.

1/2 cup sugar (I use less)
1/2 cup white vinegar
1/2 cup vegetable oil

Mix together and pour over the following finely chopped ingredients:

1 green pepper (any color is great, really)
1/2 white onion
2 green onions (if you have 'em)
2 fresh cilantro leaves (not stems)
2 fresh garlic cloves (or 2 t. minced garlic)

Drain and add:
One can black-eyed peas
One can pinto beans
one can shoepeg corn
Mix all ingredients and serve with tortilla chips (scoops are the best)
Better the second day. It ages like a fine wine. :0)

Shoepeg corn is by the other corn. I don't know what's so special about it. For black-eyed peas, nothing beats Sylvia's. Sylvia claims to be "the queen of soul food" and I believe her. I tried using other brands, or using dried black-eyed peas and it wasn't NEARLY as good. I don't know what Sylvia puts in her "specially seasoned" peas, but they are ah-ma-zing and worth the money. Here's what it looks like all stirred up. It makes a TON, so I'd suggest making it for a party or giving some away. Especially if your silly but wonderful husband won't eat it. Otherwise you might end up eating the whole bowl. Which I wouldn't suggest. Not that I've ever done that.


I'll probably be linking up to Tasty Tuesday at Balancing Beauty and Bedlam

Friday, September 3, 2010

Dirty Laundry

Well hello!

I am making sure and steady progress on my projects, but today I am going to divert us to a new one. The other day I was balancing the Quicken files and reconciling receipts. I noticed that the last time we bought laundry soap, it cost us $13! Apparently Tide has gold flakes in it or something. I was instantly motivated to get going on learning how to make our own laundry soap. At least to try.

We bought an HE washer before Ava was born. Partly because we wanted to cloth diaper, and partly because we needed a new washer anyway and there really is no comparison between top loading washers and HE washers when it comes to water efficiency. Seriously. We love it.

So after browsing some tutorials online, I decided on liquid soap. It can just go in the regular detergent drawer. This recipe is supposed to be low-sudsing (which is apparently why you need to buy special HE soap in the first place) which will also make it great for washing diapers. If diapers get soap built up, they won't absorb. If they don't absorb, they leak. If they leak, I cry. (Just kidding. Mostly.)


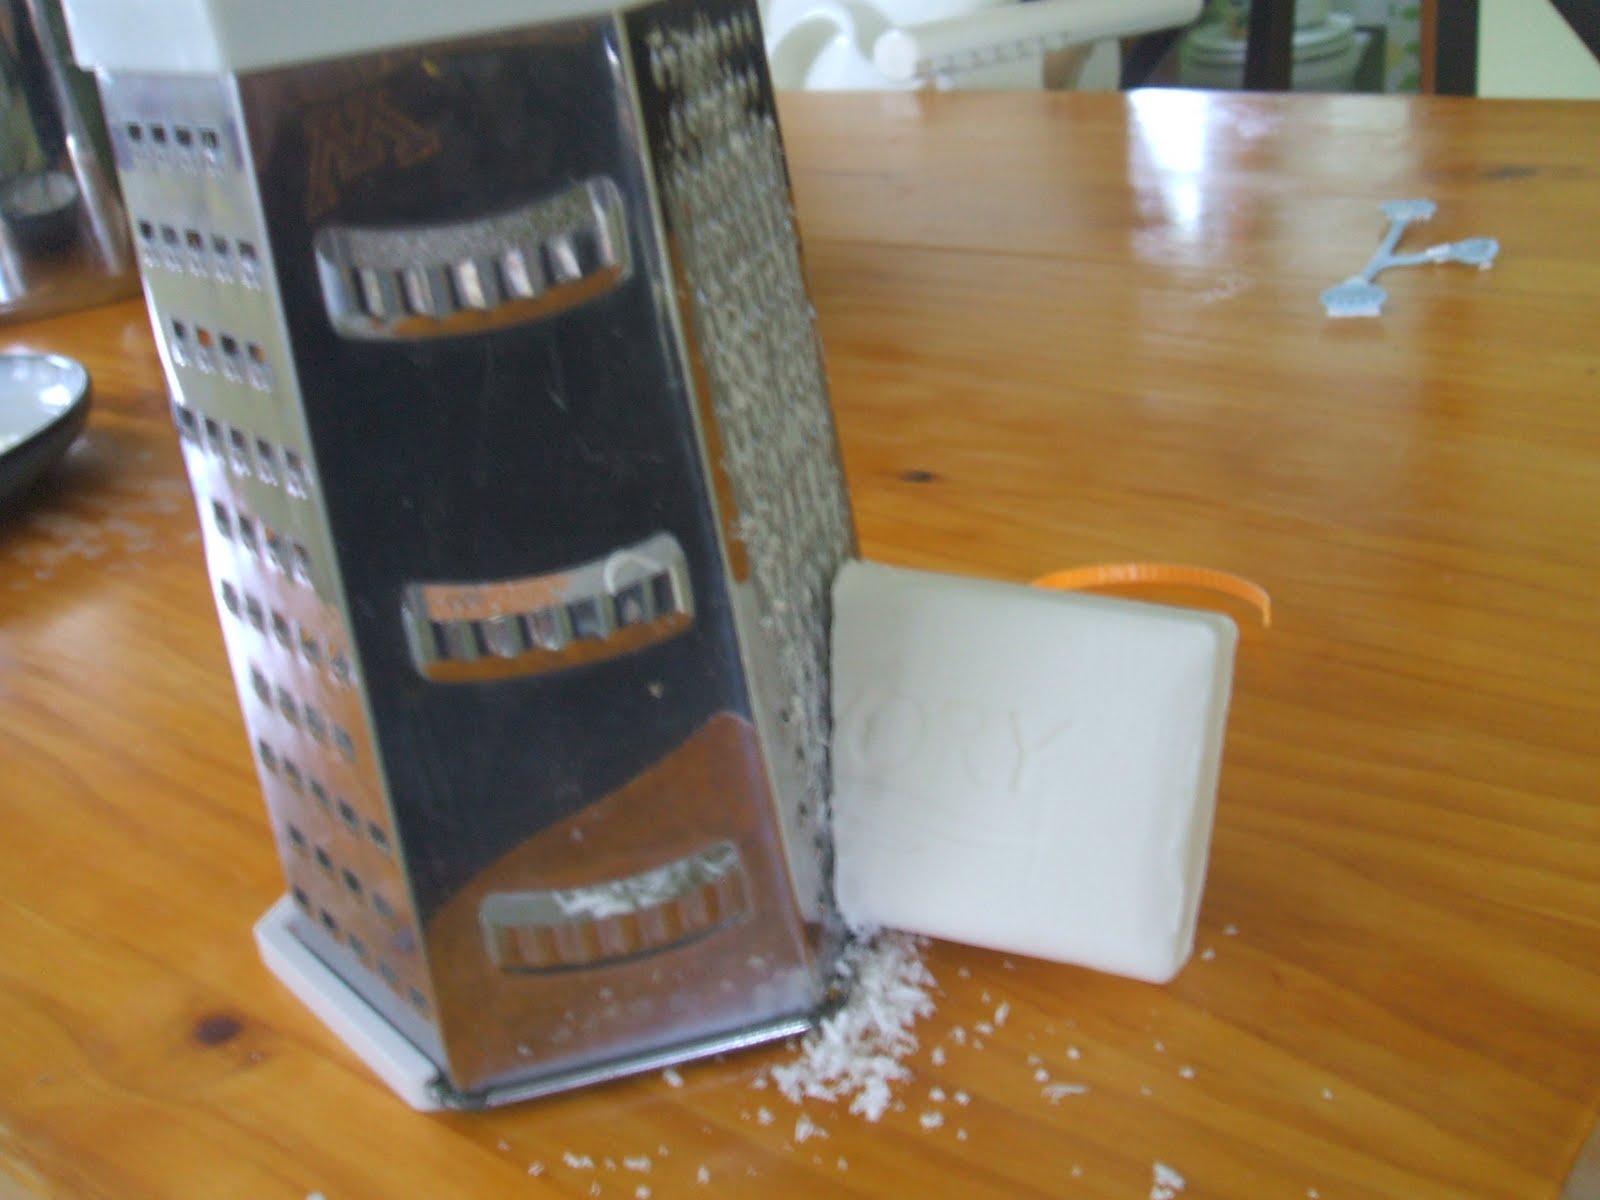
I used this tutorial (which is fabulous.) It really has all the info you need, but here's my step-by-step. First I grated some Ivory soap with a cheese grater: Put about four cups of water in a kettle. I was feeling really hard core and used a stock pot. Turns out that is totally unnecessary. You can just use a regular pot. Little by little put the soap flakes in and stir until it gets nice and soapy.
Put 3 gallons of water in a container. In case you were wondering, a gallon is 16 cups. I used my 4 cup measuring cup, so 12 of these puppies: (right? I hope so. Math is hard, let's go shopping.)

Add your soap soup from the pot to the water in the bucket. Then you add a cup of washing soda. (Yes, that's right, Walmart employee who tried to sell me baking soda instead. I want Washing soda.) Turns out washing soda is hard to find. But a friend of mine tipped me off that they carry it at a local grocery store (County Market, but I've also heard they carry it at IGA). You can also order it at Ace Hardware and they'll ship it to the store for free.
Oops, my bad. It's "super" washing soda.


Then a half-cup of Borax. Borax is a little easier to find. We got ours at Target or Walmart or something.


Then you stir it all up in your container and let it sit for 24 hours. From what the tutorial says, we should enjoy a significant cost savings. $.03/load as opposed to something like $.20/load. That's pretty serious! We will miss the gold flakes in Tide though. :0)

I read on the tutorial that you can often get buckets like this at delis, so I tried at a grocery store. And they gave me one! AND the lady saw Ava and asked if she could have a c-o-o-k-i-e. I said she could and they gave us a free cookie too! It was quite a haul at the grocery store today.
So there you have it! It was really easy. I hope it does the trick.


Wednesday, September 1, 2010

Loose Ends

Hi all,

Well I finished a major portion of my business start-up today and got it in the mail. And my mind immediately went to....projects! Big surprise, huh?

I realized that I have a lot of unfinished projects hanging around. I don't like the feeling of having them hanging over my head, so I made a list. (Love lists!)

I started this filing cabinet last winter, and came up against some roadblocks, which I think I have figured out to address. (Sorry the pictures stinks. Ava was sleeping and I wasn't going to take a chance to turn on the light. She's the lightest sleeper ever.) Here is the entryway as it looks today (you'll see that I didn't clean up before taking any of these pictures.) I have a few more ideas to add to this space.
I took a trip in July. Look what Mr. Wonderful was up to while I was away! He designed this shoe rack with CAD (a computer program) last winter and started it while I was gone. It fits perfectly in our entryway.
So, funny story. I took some maternity leave before Ava was born, and got really nesty. As in, I cleaned the stove top with a tooth pick and a q-tip. No joke--and what a difference! Anyway, I thought it would be a good time to tackle refinishing our coffee table. This huge monstrosity:
Once it was out in the garage, I realized that all the chemicals involved were probably NOT a good thing to expose to my pregnant self! So guess what. It went on the honey-do list (isn't that totally jerky?). And then Ava was born and we had no time for it and it's been sitting in our garage. Well the time has come, my friends. It's not sitting in there for another winter! So I'm doing a little at a time during naps.

So there you have it. Four projects I want to finish! There are a few others that I want to do before winter (too cold to work in the garage) and I MADE myself promise I wouldn't start any new ones before I finished these.

I think fall is so motivating! I was feeling really lazy about stuff and then I started seeing posts about fall and it got cooler for a couple days and I was reading a fall issue of Taste of Home and then I just got crazy with project lust! Poor Mr. Wonderful. He's in for a productive weekend! :0)

Saturday, August 28, 2010

Ava Update

Hi all,

Just an update on our almost-15-month old today. She is growing like crazy now! She says "Mama, Papa, wuff-wuff, hi, bye-bye, oo-oo ah-ah (monkey sound), no, no, no, no and more no. She says it all the time!

She has taken up to about 6 steps at a time, but she's still pretty cautious about it. She has, however, 3 dance moves now, so I'm hoping that she starts walking more in the next few weeks so she can bust them out at the weddings we are going to!

My other favorite things she is doing now is giving hugs upon request. And she will pat your back (or her stuffed animals) when she hugs you. She will also follow simple directions to hand us things, or put things in a container. It's so fun to realize that she understands so much of what we say.

This is a picture of her post-ponytail hair Snuggle time with Papa
Working on her "new" computer (our old laptop. She loves pounding on it!)


Trying on her bike helmet. She loved it! :0)


Tuesday, August 3, 2010

The NUMBERED Cottage

Whew!

It's been a long time! Long story short, I'm starting a small business, so projects and blogging (and lawn mowing as you will soon see) have been on hold. BUT I'm really excited about this post, because although the exterior of our house could use a lot of work, we did an upgrade this past month that really makes a big impact on our "curb appeal".

Behold: The "before" front of our house: (creepy stalkers and burglars note that we don't have anything of interest in our house, so ignore the house number). Note the sticker house numbers. For Christmas I asked for these FABULOUS house numbers. They can be found at Home Depot, but interestingly not at their website. It's like a wonderful insiders secret!

Mr. Wonderful did all of the work to put these up. I will tell you that he used some caulk-type stuff to secure the numbers, and then used the tape to hold them in place until it set. I got to enjoy the job of scraping off the ancient sticker numbers that were on our door frame. Let me tell you that Goo Gone did not really work on these suckers. Mostly just elbow grease and some scrapes in the paint on the metal door frame.

Much prettier! I love how modern and clean the numbers look. And much more readable. I would also love to paint the front steps and then paint the house number on the front steps too. Mr. Wonderful says we should worry about the exterior NEXT summer. He's probably right!
Also I changed out the flowers in my wreath to match the ones in the coffeepot on the front steps. Less cluttery that way, I think.


Monday, July 12, 2010

the Mama Bag

Woot! The sewing bug has bit again. And the venom is sweet.

I tried out another bag from Handmade Home by Amanda Blake Soule. This one is called the Mama Bag. That's right. I sewed myself a purse! Mr. Wonderful laughed at me because he thinks I have too many purses. I did buy myself a purse this summer at a rummage sale, but believe it or not, it's TOO big. It's so cavernous that I can never find what I need. I wanted to downsize. And I wanted something less...hippie-ish. Don't get me wrong, I love hippies! I just don't want to carry their purse all the time. :0)
I added some pleats to the front ala Gussy. Gussy makes me want to pleat and ruffle everything in sight.

Can I tell you that I was like a woman possessed during this project? I finished it in a day, using one whole 2 hour nap and probably another hour during the evening. I couldn't stop myself! I am so excited about how much better I'm getting at sewing! Next I want to try tackling patterns. Patterns are very intimidating to me. With their fragile nature and their tracing chalk. They are kind of like bobbins to me. Although I think I am slowly conquering the bobbin!
I think what I have learned from sewing is to just go for it. Yeah, maybe your idea won't work, but you can always tear it out and try it again. And I've learned to be a little more careful with my work. I think having a young baby I got in the habit of being happy if things just got done, and didn't worry about the quality of the job. So I took my time with this purse, and got a little nitpicky with it. It paid off!
Now get out there and sew!

Wednesday, July 7, 2010

Faux Roman Blindy Thingys

I don't know if I've mentioned it on the blog before, but we received an awesome gift from a friend for our baby. She works for a trade magazine that specializes in baby gear and thus gets a bunch of awesome freebies through work. She passed along a COMPLETE nursery from Cocalo Couture, and some other things to boot which totally floored us and made outfitting Ava's room a breeze. I love all of it, but since our nursery is small, we has to put the crib next to a window. If you have kids you know there are all sorts of safety precautions to make when it comes to windows. It's gotten to the point where I wasn't totally comfortable having those long drapes so close to her when she isn't supervised. (Choking hazard? Suffocation? There is so much to worry about!)

So I took a cue from some other bloggers and decided to try making some Roman Shade looking things. I read some other blogs, here, here, and here. Then I decided to wing it and make it up as I went along. I knew I wanted to just keep the curtain rod. No cornice or anything fancy. I liked the Nester's idea of just tying it up with ribbon, but the curtain was way too long to do that and I didn't want to cut it down. So I did sort of a fusion of a Roman Shade tied up.
Not perfect, but safer. And I safety pinned up the ribbons on the bottom, so if she ever gets tall enough to reach it I can always pin it up higher. :0)